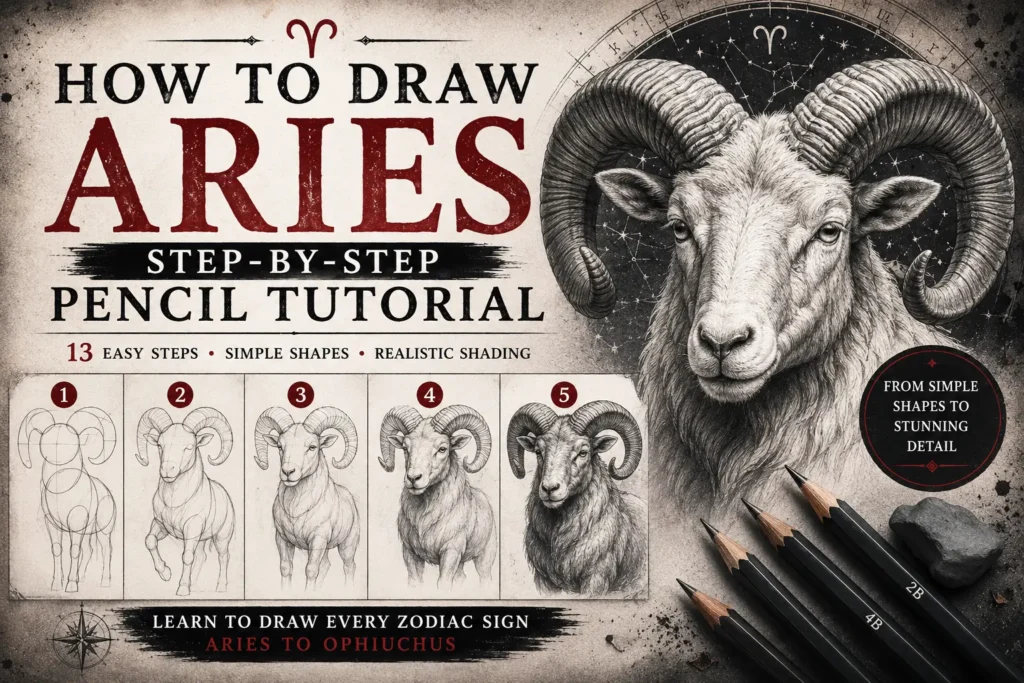
Learn how to draw Aries with this easy step-by-step pencil tutorial. Whether you’re a complete beginner or an experienced artist looking for zodiac drawing inspiration, this guide will show you how to sketch the iconic ram using simple construction shapes before building realistic detail with graphite shading. Click back to the How to draw every sign hub for other signs.
Contents
- What You’ll Learn
- Materials You’ll Need
- Step 1: Draw the Construction Shapes
- Step 2: Sketch the Basic Form
- Step 3: Add the Facial Features
- Step 4: Build Texture & Shading
- Step 5: Complete the Drawing
- Tips for Drawing Aries
- Common Mistakes
- Aries Symbolism
- Explore More Zodiac Drawing Tutorials
- Frequently Asked Questions
What You’ll Learn
By the end of this tutorial you’ll know how to:
- Draw an accurate Aries ram using basic shapes.
- Build realistic proportions.
- Sketch powerful curved horns.
- Add fur texture and graphite shading.
- Create a finished zodiac illustration suitable for your sketchbook or wall art.
Materials You’ll Need
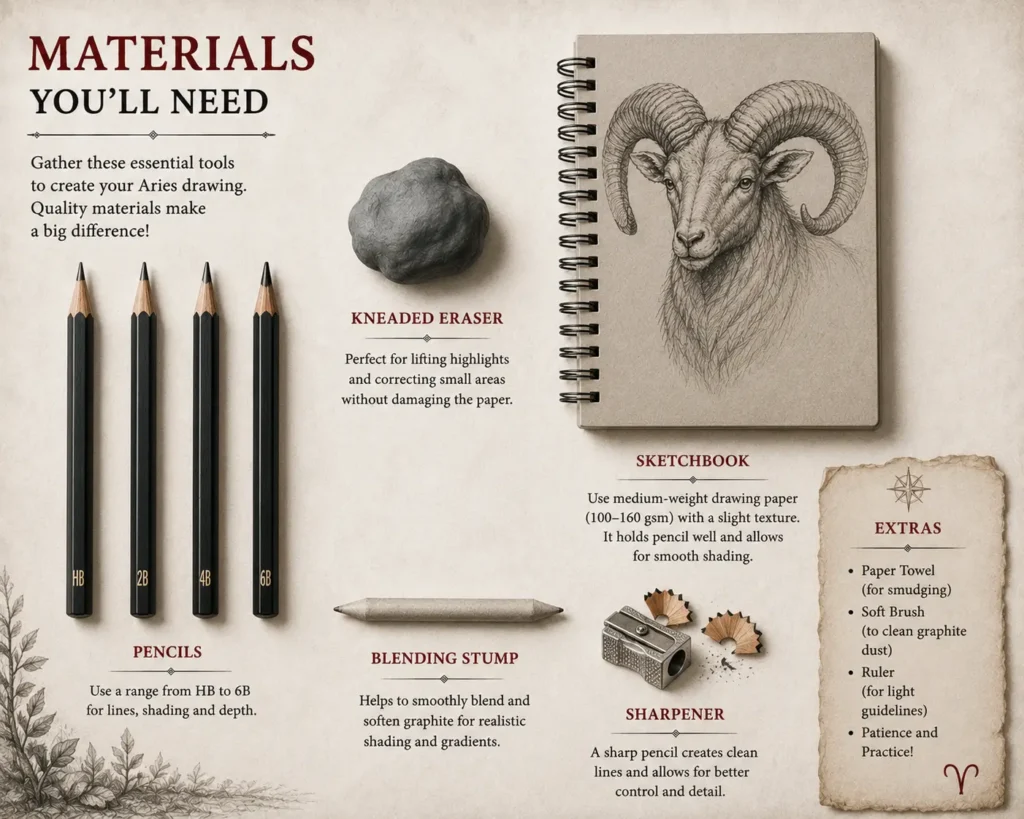
You don’t need expensive equipment. These basic graphite tools are enough to complete every tutorial in this series.
Recommended materials:
- HB pencil
- 2B pencil
- 4B pencil
- 6B or 8B pencil
- Kneaded eraser
- Blending stump (optional)
- Smooth drawing paper (120–200gsm)
Step 1: Draw the Construction Shapes
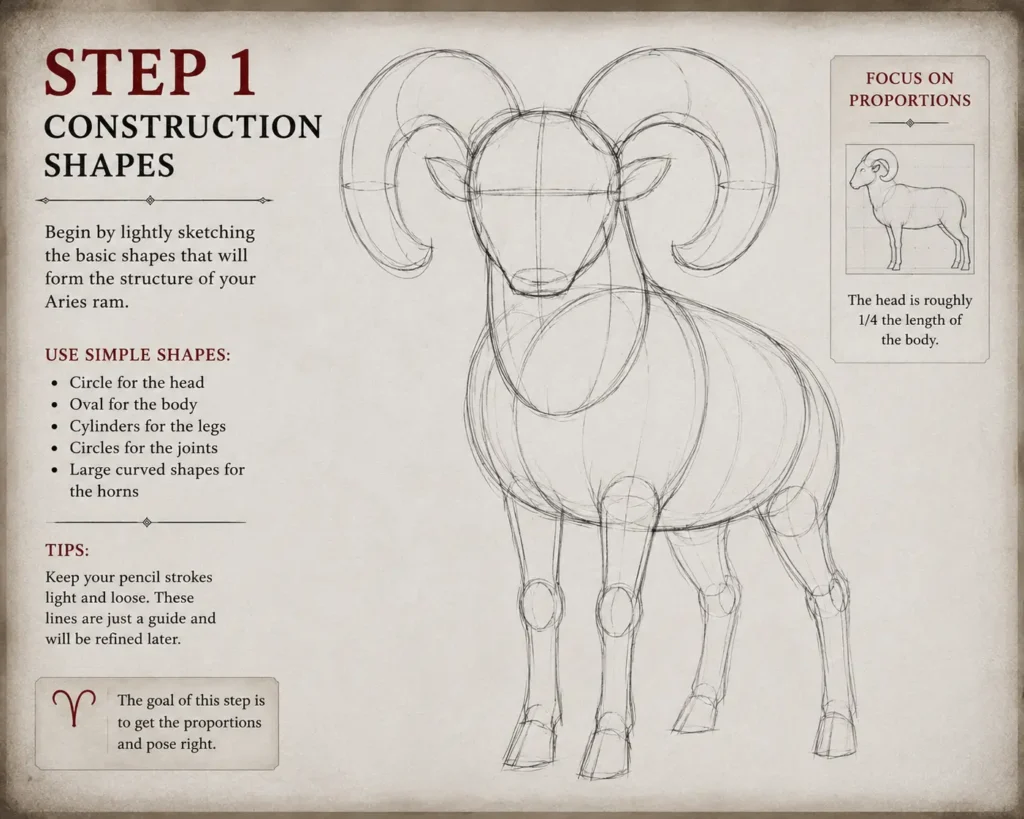
Begin by lightly sketching the basic framework with a good graphite pencil.
Use:
- one circle for the head
- one large oval for the body
- cylinders for the legs
- sweeping circles to map the horns
Don’t worry about details yet. The goal is to establish balance and proportion before refining the drawing.
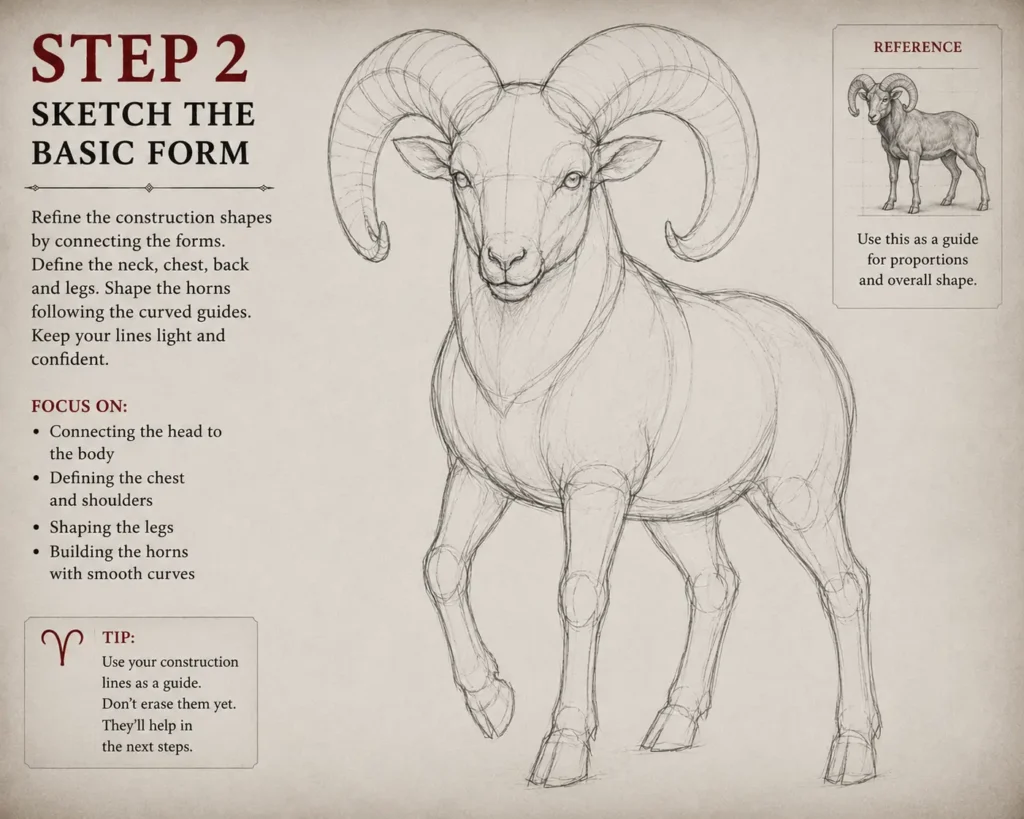
Step 2: Sketch the Basic Form
Using the construction lines as a guide, begin joining the shapes together.
Focus on:
- the chest
- shoulders
- back line
- legs
- neck
Then refine the distinctive spiral horns that make Aries instantly recognisable.
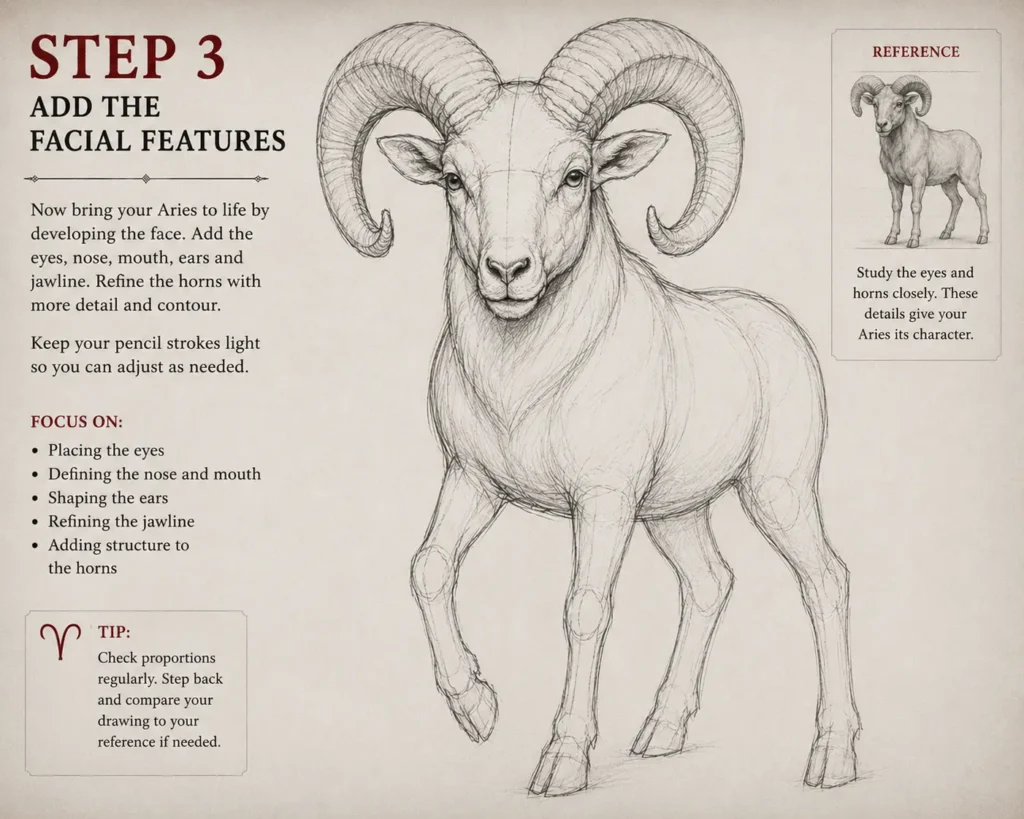
Step 3: Add the Facial Features
Now develop the character.
Sketch:
- the eyes
- nose
- ears
- jawline
Avoid heavy outlines. Use confident, light pencil strokes that can be refined later.
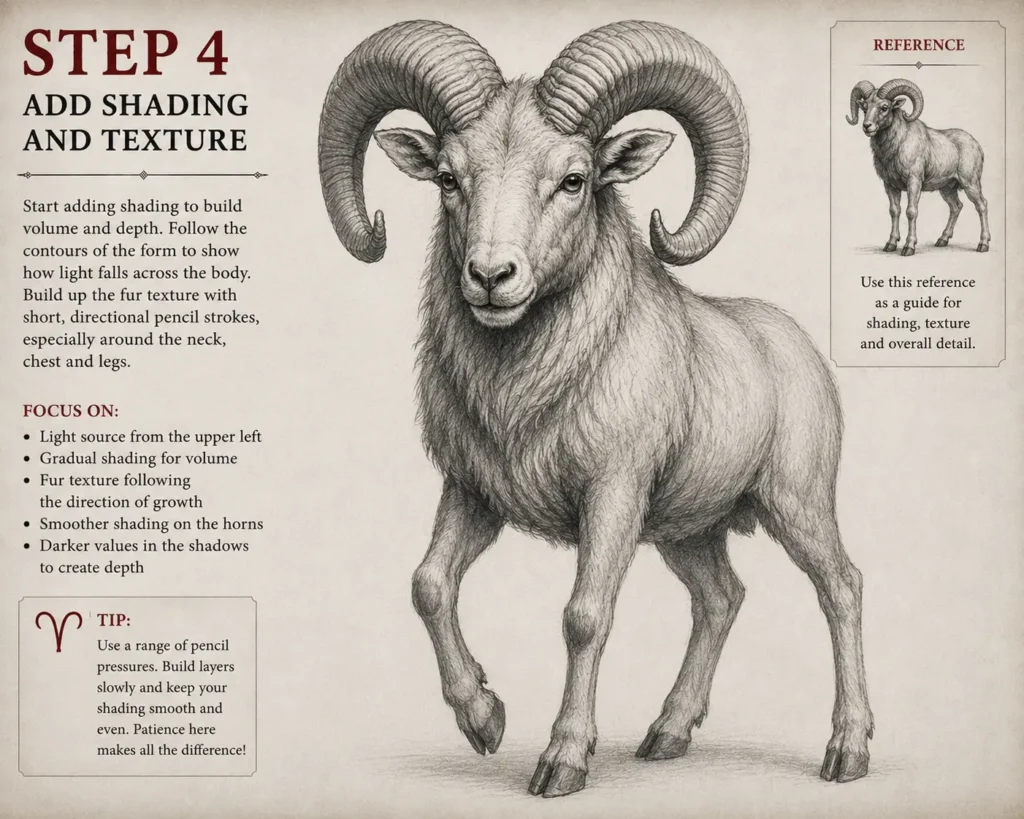
Step 4: Build Texture & Shading
Start adding depth.
Work gradually using layers of graphite.
Pay attention to:
- horn texture
- fur direction
- shadows beneath the neck
- muscles of the shoulders
- folds around the legs
Use softer pencils (4B–8B) for the darkest shadows.
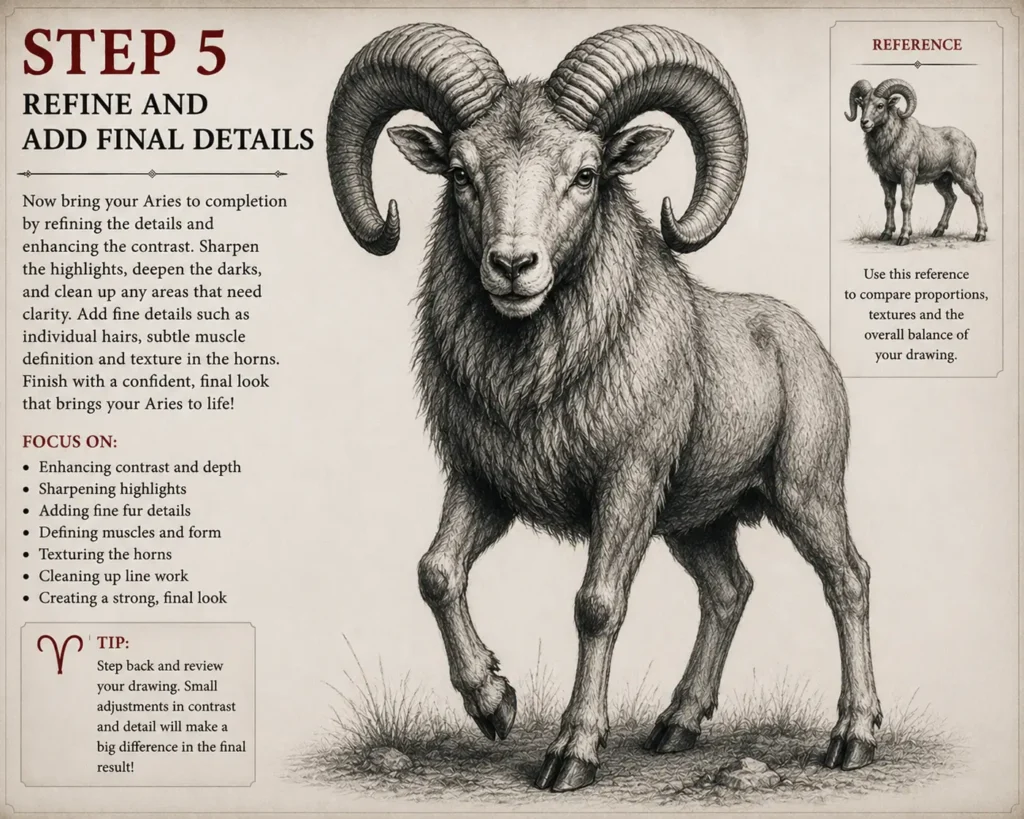
Step 5: Complete the Drawing
Finish by strengthening your darkest values.
Add:
- fine fur detail
- highlights with an eraser
- sharper horn ridges
- deeper contrast beneath the body
Small details make the drawing feel realistic without overworking it.
Tips for How to Draw Aries
✔ Keep your construction lines light.
✔ Draw the horns before adding detail elsewhere.
✔ Build shading slowly rather than pressing hard.
✔ Study real ram photographs to understand anatomy.
✔ Rotate your paper when drawing curved horn lines.
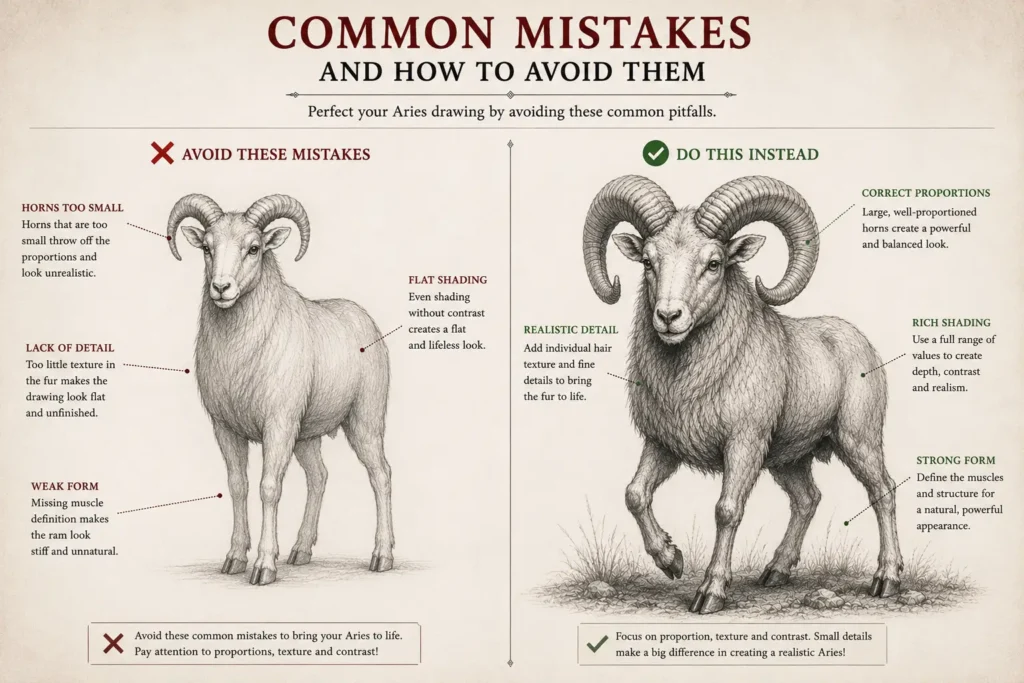
How to Draw Aries: Common Mistakes
Making the horns too small
The horns are the defining feature of Aries. Give them enough size to create a powerful silhouette.
Pressing too hard too early
Dark lines are difficult to erase. Build your values gradually with a good graphite pencil.
Ignoring fur direction
Following the natural flow of the fur creates much more realistic shading.
Symmetry
Don’t worry about making both horns perfectly identical. Slight variations make the drawing feel more natural.
Aries Symbolism
Aries is the first sign of the zodiac and represents courage, determination, confidence, and new beginnings. Traditionally symbolised by the ram, Aries has long been associated with strength and fearless leadership.
The ram’s powerful curved horns make it one of the most rewarding zodiac animals to draw, offering excellent opportunities to practise texture, anatomy, and dramatic graphite shading.
In mythology, the ram represents initiative, resilience and determination. Learning to draw Aries is excellent practice for capturing muscle, movement and expressive animal anatomy.
Coming Soon: Printable Aries Drawing Pack
Perfect for artists who prefer to learn offline. The downloadable pack will include printable worksheets, tracing templates, high-resolution reference images and a colouring page.
Includes
- printable PDF
- tracing guide
- colouring page
- reference sheet
Coming Soon
Explore More Zodiac Drawing Tutorials
Build your complete Zodiac Sketchbook: as they become available….
- How to Draw Taurus
- How to Draw Gemini
- How to Draw Cancer
- How to Draw Leo
- How to Draw Virgo
- How to Draw Libra
- How to Draw Scorpio
- How to Draw Sagittarius
- How to Draw Capricorn
- How to Draw Aquarius
- How to Draw Pisces
- How to Draw Ophiuchus
Or return to the How to Draw Every Zodiac Sign (13 Step-by-Step Tutorials) hub.
Frequently Asked Questions on How to Draw Aries
Is Aries easy to draw?
Yes. Once you establish the construction shapes, the ram is one of the easiest zodiac animals to build into a realistic graphite pencil drawing.
What pencils are best for drawing Aries?
An HB graphite pencil is ideal for the initial sketch, while 4B–8B graphite pencils help create rich shadows and realistic fur texture.
Can beginners draw Aries?
Absolutely. This tutorial breaks the process into simple stages that are suitable for artists of all skill levels.
Should I use a reference image?
Yes. Observing real rams will help you understand anatomy, horn structure, and fur direction, resulting in a more convincing finished drawing.
<PISCES | ARIES | TAURUS>